Why Your Makeup Never Sits Right: Skin Texture Issues and How to Fix Them
You spent time applying your foundation, blended it carefully, and set it with powder — but two hours later it looks like your face ate the makeup rather than wore it. If you've ever wondered why does makeup look cakey and uneven no matter what you try, the answer almost always starts underneath the product itself: your skin's surface texture.
The good news is that this is one of the most fixable beauty frustrations there is. Once you understand what's happening at a skin level and address it before you ever open your compact, your results will look dramatically different. This guide breaks down every major cause of skin texture makeup problems and gives you the clear, actionable steps to fix them for good.
The Most Common Makeup Complaints — and What They're Really Telling You
Before diving into solutions, it helps to identify exactly which problem you're experiencing, because each symptom points to a different underlying cause.
- Cakey, heavy-looking foundation — product is piling up on dead skin cells or sitting on top of dry patches rather than melting into skin.
- Foundation settling into fine lines — the skin around the eyes and mouth lacks hydration, causing product to migrate into creases.
- Patchy coverage that won't blend out — uneven skin surface from dryness, flaking, or an inconsistent moisture barrier.
- Makeup emphasizing pores — large or congested pores create a textured canvas that certain formulas cling to and highlight.
- Makeup disappearing or fading by midday — skin is either too oily (breaking down the formula) or too dry (absorbing moisture from the foundation).
- Uneven skin tone showing through coverage — the foundation formula doesn't match the skin's needs, or the application layer is too thin to provide even coverage on a bumpy surface.
Recognizing your specific complaint is the first step. All of these issues are rooted in skin texture makeup problems — which means the fix happens in your prep, not in piling on more product.
Why Skin Texture Ruins Makeup Application
Think of your skin like a wall you're about to paint. A smooth, primed wall gives you an even, beautiful result. A rough, unprimed wall with chips and cracks? The paint settles into every imperfection and looks inconsistent no matter how many coats you apply. Your skin works exactly the same way.
The main texture culprits include:
Dead skin cell buildup. Your skin naturally sheds dead cells every 28 to 40 days, but that cycle slows with age, stress, and environmental factors. When dead cells accumulate on the surface, they create a rough, uneven texture that foundation clings to in all the wrong places. This is the single most common reason why does makeup look cakey and uneven — and it's entirely preventable.
Dehydration vs. dryness. These are two different things. Dry skin lacks oil. Dehydrated skin lacks water. Both can cause flaking and patchy foundation, but they respond to different solutions. Dehydrated skin often feels tight even if you're oily, and it's one of the most overlooked causes of difficult makeup application.
Enlarged or congested pores. Pores filled with sebum or debris appear larger and create a bumpy texture. Certain foundation formulas — especially thicker, full-coverage ones — sit on top of these bumps and actually draw more attention to them.
Uneven skin surface from breakouts or scarring. Active blemishes and post-acne texture changes create peaks and valleys that make even blending nearly impossible without the right prep and application technique.

Exfoliation: The Single Most Impactful Step for Better Makeup
If there is one change that will improve your makeup application more than any product or technique, it is consistent exfoliation for better makeup results. Removing the layer of dead skin cells that accumulates on the surface transforms how every formula sits and blends.
There are three main approaches:
Chemical exfoliation uses acids — most commonly AHAs like glycolic and lactic acid, or BHAs like salicylic acid — to dissolve the bonds between dead skin cells, encouraging them to shed naturally. AHAs work on the skin's surface and are excellent for dry, dull, or aging skin. BHAs penetrate into pores and are better suited to oily or acne-prone skin. Used two to three times per week (or nightly with gentler formulas), chemical exfoliation produces the smoothest possible surface over time.
Physical exfoliation uses gentle manual action — a soft facial scrub, a cleansing brush, or a textured cloth — to manually buff away dead cells. This can be effective but needs to be approached carefully. Over-aggressive physical exfoliation damages the skin barrier and can worsen texture rather than improve it. The key is light pressure and fine-grained or soft-textured tools, no more than two to three times a week.
Dermaplaning is a technique that uses a fine, angled blade to remove both dead skin cells and vellus facial hair (peach fuzz) from the surface of the skin. It's one of the most dramatic ways to create an ultra-smooth canvas for makeup. When done correctly — by a professional or at home with a proper dermaplaning tool — the results are immediately visible: foundation glides on smoothly, blurs into the skin, and looks significantly more natural. Many people who struggle with cakey or uneven foundation find that dermaplaning is a game-changer, particularly for the cheeks, chin, and forehead where peach fuzz traps product.
A general guideline: exfoliate the night before a big event or photo, not the morning of. Freshly exfoliated skin can be slightly sensitized, so giving it a few hours to settle and adding a layer of moisturizer overnight yields the best makeup results the next day.
Hydration and Moisturizing: The Foundation Under Your Foundation
Knowing how to prep skin for flawless makeup means understanding that hydration is non-negotiable. Makeup applied to dry or dehydrated skin will always look older, more textured, and less polished than the same product applied to properly moisturized skin.
For dry skin types, a richer moisturizer applied at least 10 minutes before foundation gives the formula something to meld with rather than fight against. For oily skin, a lightweight, water-based gel moisturizer still matters — skipping it entirely causes the skin to overproduce oil to compensate, making makeup melt faster.
Hyaluronic acid serums applied to damp skin before moisturizer can make a significant difference, particularly around the eyes and mouth where fine lines tend to catch product. These humectants draw water into the skin, plumping the surface slightly and filling in creases before you apply a single drop of foundation.
Allow all skincare layers to absorb fully before moving on to primer or foundation. Applying makeup onto skin that is still tacky or wet from moisturizer is one of the most common causes of pilling and uneven application.
Priming: The Bridge Between Skincare and Makeup
Primer is the step many people skip — and it's the one that often makes the biggest difference for how to get smooth makeup application results. A primer creates a uniform base layer that fills in texture, controls oil or dryness, and helps foundation adhere evenly throughout the day.
Different primers address different texture concerns:
- Silicone-based primers fill in pores and fine lines, creating a smooth, poreless-looking finish. They work best under fuller-coverage foundations but can cause pilling under certain water-based formulas.
- Water-based primers add a layer of hydration and work well under water-based foundations. They're a better choice for dry or sensitive skin types.
- Mattifying primers contain ingredients that absorb excess oil, helping makeup last longer on oily skin without sliding or separating.
- Illuminating primers contain light-reflecting particles that blur texture visually. They work best in the T-zone and on areas where you want a healthy glow.
The key rule: match your primer base (silicone or water) to your foundation base. Layering products with incompatible bases is a primary cause of pilling and patchy application.

Choosing the Right Foundation Formula for Your Skin Texture
Even perfect skin prep can be undone by choosing a foundation formula that works against your skin type. This is one of the most overlooked aspects of skin texture makeup problems.
For dry or textured skin: Avoid matte and full-coverage formulas, which tend to look heavy and settle into lines. Look for satin, dewy, or skin-tint formulas with buildable coverage. These melt into the skin rather than sitting on top of it.
For oily skin: Dewy formulas will slide and break down quickly. A lightweight, oil-free, or matte formula will last longer and look more uniform throughout the day. Avoid heavy, oil-containing foundations that add shine to already-oily areas.
For combination skin: Consider using two different formulas — a more mattifying one in the T-zone and a more nourishing formula on the cheeks — or use a balanced, medium-coverage formula and set selectively with powder only where needed.
For skin with large pores: Medium-coverage, lightweight formulas blurred with a damp sponge tend to look most natural. Heavy, full-coverage formulas can fill pores and look cakey. A pore-filling primer underneath makes any formula look smoother.
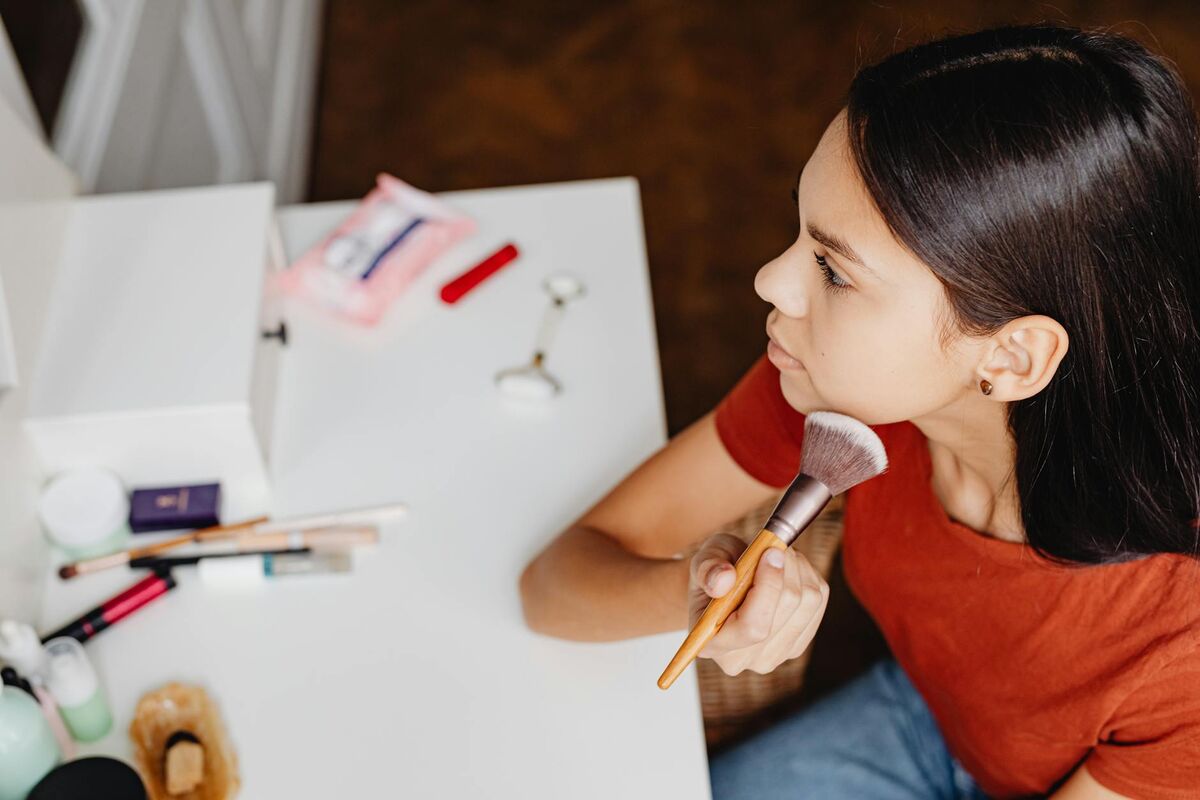
Application Tools: Brushes, Sponges, and Fingers
The tool you use to apply foundation affects the finish just as much as the formula itself. Understanding which tool does what is a key part of mastering how to get smooth makeup application.
Damp beauty sponges (used wet, not dry) give the most natural, skin-like finish. The bouncing, stippling motion blends foundation into the skin rather than dragging it across the surface — which means it sits more evenly on texture. This is generally the best tool for dry and textured skin types.
Foundation brushes (flat or stippling) offer more control and are excellent for building coverage in targeted areas. A stippling brush in a circular buffing motion is particularly good for minimizing the appearance of pores. The key is to use a light hand — pressing too hard with a brush drags product and creates streaks.
Fingers work surprisingly well for light-coverage formulas and skin tints. Body heat warms the product, helping it melt into the skin. This technique is best on skin that is already smooth and well-hydrated; it tends to emphasize texture on rough or dry skin.
A note on tool hygiene: dirty brushes and sponges transfer bacteria back to the skin and break down product emulsification, both of which contribute to patchy, uneven application. Cleaning tools weekly (or more frequently for sponges) is a simple habit that makes a visible difference.
Setting Techniques That Don't Make Texture Worse
Powder is the other common culprit behind cakey-looking makeup. Over-powdering — or powdering areas that don't need it — is one of the fastest ways to add years to your look and emphasize texture.
The better approach is targeted setting: use loose or pressed powder only where you need it (typically the T-zone and under eyes) rather than dusting it all over the face. Use a fluffy brush for light, buildable coverage rather than pressing a dense puff directly onto the skin.
Baking — pressing a heavy layer of powder under the eyes and letting it sit — can look beautiful in photos but can be very aging on textured or mature skin in person. A lighter hand with translucent powder and a final spritz of setting spray will give a more natural, all-day finish without the heavy appearance.
Setting sprays deserve special mention: they bind all layers of makeup together and can transform a powdery, cakey finish into something that looks like skin. Pressing a setting spray into the face with a damp sponge (the "baking with moisture" technique) is particularly effective for anyone whose foundation tends to look dry or textured by the end of the day.
Building a Consistent Skin Prep Routine for Flawless Makeup
The day-of prep routine matters enormously, but the longer-term skincare habits you build are what create lasting improvement in your makeup results. Here is a practical framework for both.
Day-of makeup prep routine:
- Cleanse with a gentle, non-stripping cleanser.
- Apply a hydrating toner or essence to damp skin.
- Layer a hyaluronic acid serum while skin is still slightly damp.
- Apply moisturizer appropriate for your skin type. Wait 5 to 10 minutes.
- Apply SPF if not included in your moisturizer. Wait 2 to 3 minutes.
- Apply primer matched to your foundation base. Wait 1 to 2 minutes.
- Apply foundation with your chosen tool, building in thin layers.
- Set only where needed with minimal powder.
- Finish with setting spray.
Long-term habits that make the biggest difference:
- Exfoliate consistently 2 to 3 times per week (chemical or physical, not both on the same day).
- Use a retinol or retinoid in your evening routine — over time this dramatically improves skin texture, pore size, and skin cell turnover.
- Stay hydrated. Skin dehydration shows up immediately on the surface and worsens the appearance of every texture issue.
- Never sleep in makeup. Product left on overnight clogs pores, disrupts skin cell renewal, and creates the rough texture that makes the next day's application harder.
- Consider dermaplaning every three to four weeks for a consistent, ultra-smooth base — particularly effective before important events.
Final Verdict
If you've been wondering why does makeup look cakey and uneven despite following tutorials and buying new products, the answer is almost certainly in what's happening before the makeup goes on — not the makeup itself. Dead skin buildup, dehydration, skipped primer, the wrong formula for your skin type, and over-powdering are all solvable problems that don't require expensive solutions.
The path to flawless makeup application is a consistent skincare routine, regular exfoliation (including dermaplaning for those who want the smoothest possible canvas), matched product formulas, and thoughtful application technique. Start with one change — most people find that adding a proper exfoliation routine makes the single biggest visible difference — and build from there.
Beautiful makeup starts with the skin underneath it. When you treat the canvas as seriously as the paint, the results speak for themselves.