5 Yoga Poses That Strengthen and Relieve Foot Pain Naturally
If your first few steps in the morning feel like walking on glass, or the arch of your foot aches after a long day on your feet, you are far from alone. Yoga for foot pain has emerged as one of the most accessible, evidence-informed approaches to both relieving discomfort and building the lasting strength that prevents it from coming back. Unlike medications that mask symptoms, or passive rest that can allow supporting muscles to weaken further, yoga actively engages the 26 bones, 33 joints, and more than 100 muscles, tendons, and ligaments that make up each foot.
Research published in the Journal of Bodywork and Movement Therapies found that targeted foot and ankle exercises — many of which mirror classic yoga movements — significantly reduced pain scores and improved function in people with plantar fasciitis. Meanwhile, a 2023 systematic review in Complementary Therapies in Medicine concluded that yoga-based interventions produced measurable improvements in foot flexibility and balance in older adults, a population especially vulnerable to fall-related injuries stemming from weak or rigid feet.
The five poses outlined below were chosen because they collectively address the most common root causes of foot pain: tight plantar fascia and calf muscles, weak intrinsic foot muscles, poor toe mobility, and restricted ankle range of motion. Each pose comes with clear step-by-step instructions, the specific foot-health benefits it targets, practical modifications for people who are currently in pain, and the most common mistakes to avoid. Whether you have a formal diagnosis of plantar fasciitis or simply suffer from the kind of chronic foot fatigue that modern footwear and hard floors produce, this routine can help.
Why Yoga Is Particularly Effective for Foot Health
Most conventional approaches to foot pain focus on a single structure — the plantar fascia, a heel spur, a compressed nerve. Yoga, by contrast, treats the foot as part of an interconnected kinetic chain. Tightness in the calf muscle (gastrocnemius and soleus) directly increases tension on the plantar fascia at the heel. Weakness in the intrinsic muscles of the foot causes the arch to collapse, shifting load onto the plantar fascia. Poor hip alignment changes how force travels through the ankle and into the arch with every step. Yoga for foot pain addresses all of these layers simultaneously.
Practicing yoga barefoot is itself therapeutic. Modern athletic shoes, while protective, prevent the 29 intrinsic muscles of the foot from firing fully. Barefoot yoga reactivates these muscles, improves proprioception (the body's sense of its own position), and gradually restores a more natural load distribution across the foot. Even 10 to 15 minutes of dedicated practice three to four times a week can produce noticeable changes within four to six weeks.

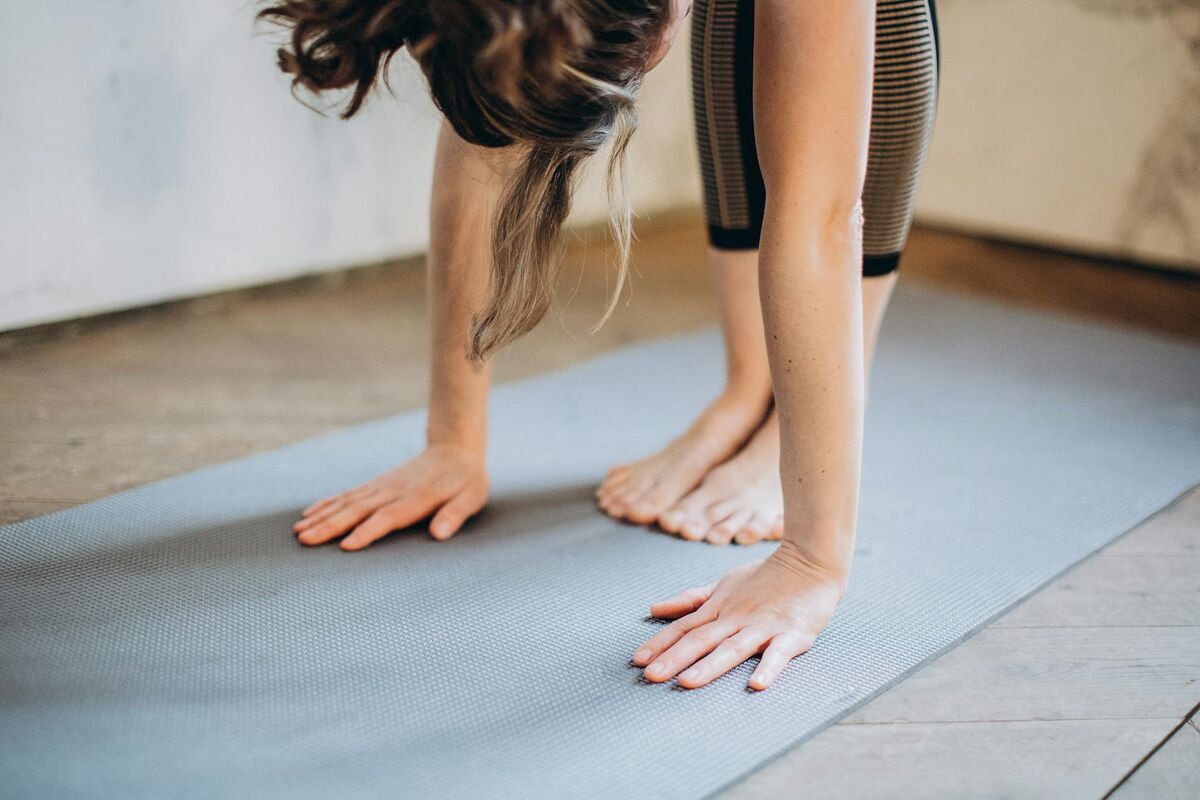
Pose 1: Downward-Facing Dog (Adho Mukha Svanasana)
Downward-facing dog is perhaps the single most effective yoga pose for addressing the calf and plantar fascia tightness that underlies most cases of chronic heel and arch pain. It is the cornerstone of yoga for foot pain routines precisely because it stretches the entire posterior chain — from heel to hamstring — in one sustained position.
How to Do It
- Begin on your hands and knees, with wrists directly under shoulders and knees under hips.
- Tuck your toes under and press your palms firmly into the mat, spreading your fingers wide.
- Exhale and lift your knees away from the floor, sending your hips up and back toward the ceiling.
- Straighten your legs as much as comfortable, pressing your heels gently toward the mat — they do not need to touch.
- Keep your head between your upper arms, gaze toward your navel or between your feet.
- Hold for 5 to 10 slow breaths. With each exhale, gently press the heels a little closer to the floor.
Benefits for Feet
This pose delivers an intense, sustained stretch to the gastrocnemius and soleus muscles — the two primary calf muscles whose tightness is one of the biggest contributors to plantar fasciitis. It also stretches the plantar fascia itself through the tucked-toe entry position. Regular practice gradually increases the resting length of these tissues, reducing the peak tension they experience during walking and running.
Modifications for People in Pain
If your heels are very far from the floor and you feel strain in the lower back, bend your knees generously. A bent-knee downward dog still provides a powerful calf and fascia stretch while protecting the lumbar spine. You can also place a folded blanket under your heels to reduce the intensity, then progressively thin the blanket over several weeks as flexibility improves.
Common Mistakes
The most common error is rounding the lower back in an effort to push the heels down. Prioritize a long, straight spine and let the heel-to-floor distance take care of itself over time. Also avoid gripping the mat only with the heel of your hand — distribute weight evenly across all four corners of each palm to protect your wrists.
Pose 2: Toe Squat (Vajrasana Variation)
The toe squat is one of the most direct and intensely effective yoga toe stretches for foot pain relief in the entire yoga canon. It looks deceptively simple. In practice, people with tight plantar fascia and stiff toe joints often find it one of the most challenging positions they have ever attempted — which is a reliable indicator of how much work those tissues need.
How to Do It
- Kneel on your mat and tuck all ten toes under so that the balls of your feet and the undersides of your toes are pressed into the mat.
- Slowly lower your hips back toward your heels, sitting your weight onto your heels while keeping the toes tucked.
- Place your hands on your thighs and sit upright with a tall spine.
- Begin with 30 seconds and build gradually to 2 to 3 minutes over several weeks.
- To release, place your hands on the floor and carefully untuck one foot at a time.
Benefits for Feet
The toe squat delivers a direct, sustained stretch to the plantar fascia along its full length — from heel to the base of the toes. It also mobilizes the metatarsophalangeal joints (the knuckles of the foot), which become stiff and compressed in pointed or narrow-toed footwear. Improved toe extension mobility is directly linked to reduced plantar fascia strain during the push-off phase of walking and running. This makes it one of the top natural foot pain remedies yoga practitioners and physical therapists recommend alike.
Modifications for People in Pain
If the intensity is overwhelming, place a folded blanket between your calves and thighs to reduce how much weight is loaded onto the toes. You can also practice the stretch in a standing position — placing your toes against a wall at a low angle — before progressing to the floor version. Work in short intervals (10 to 15 seconds on, rest, repeat) rather than one sustained hold.
Common Mistakes
Many people curl their little toes under rather than spreading and tucking all toes evenly. Check that all five toes of each foot are genuinely tucked and bearing some load — this ensures the stretch addresses the full width of the plantar fascia rather than just the medial (inner) band.

Pose 3: Hero Pose (Virasana)
Hero pose is the counterbalance to the toe squat, and the two are ideally practiced together. Where the toe squat stretches the undersole of the foot, hero pose targets the tops of the feet, the ankle extensors, and the anterior tibialis — tissues that become chronically shortened in people who spend long hours in heeled shoes or who pronate their ankles when walking.
How to Do It
- Kneel with your knees together and your feet slightly wider than hip-width, tops of feet flat on the mat.
- Slowly lower your hips to sit between your feet — or onto a yoga block or folded blanket if your hips do not comfortably reach the floor.
- Place your hands on your thighs, palms down, and sit tall with a neutral spine.
- Press the tops of your feet actively into the mat and feel the stretch across the ankle and the top of the foot.
- Hold for 1 to 3 minutes, breathing steadily.
Benefits for Feet
Hero pose stretches the tibialis anterior and the extensor digitorum longus — the muscles that run along the shin and the top of the foot. These muscles work eccentrically during each footfall to control how quickly the foot pronates, and when they are tight or fatigued, they contribute to shin splints, ankle instability, and altered foot mechanics. The ankle plantar flexion position of the pose also lubricates the ankle joint and maintains the range of motion needed for pain-free walking downhill and descending stairs.
Modifications for People in Pain
If sitting between the heels causes knee pain, place one or two yoga blocks or a thick, folded blanket beneath your sitting bones. The prop raises your centre of gravity enough to reduce compression at the knee joint. People with a history of knee surgery or ligament laxity should consult a physiotherapist before attempting this pose unsupported.
Common Mistakes
Allowing the feet to sickle outward — so that you end up sitting on the outer edges of your ankles rather than between your feet — dramatically reduces the therapeutic benefit and strains the lateral ankle ligaments. Keep the tops of the feet flat and parallel to each other throughout the hold.
Pose 4: Reclined Big Toe Pose (Supta Padangusthasana)
For people dealing with tight hamstrings, sciatic nerve irritation, or foot pain that radiates from the lower back or hip, the reclined big toe pose is an essential addition to any yoga poses for plantar fasciitis practice. It isolates the calf, hamstring, and the entire posterior leg — the tissues that, when tight, pull on the heel and increase plantar fascia load — without requiring any balance or weight-bearing through the affected foot.
How to Do It
- Lie flat on your back on the mat. Extend both legs along the floor.
- Bend your right knee toward your chest and loop a yoga strap, resistance band, or towel around the ball of your right foot.
- Holding both ends of the strap, extend your right leg toward the ceiling as straight as comfortable.
- Flex your right foot strongly — pulling the toes toward your shin — to deepen the calf and fascia stretch.
- Keep your left leg active and pressed into the mat, lower back gently released.
- Hold for 5 to 10 breaths, then switch sides.
Benefits for Feet
The active dorsiflexion (foot flexion toward the shin) in this pose creates a strong stretch along the calf, Achilles tendon, and plantar fascia simultaneously. Because the position is fully supine, it eliminates the compressive load of standing poses, making it ideal for days when foot pain is more acute. The pose also gently mobilises the sciatic nerve, which can become adhered and sensitised in people with chronic lower-back tightness — a pattern that sometimes presents as burning or tingling in the sole of the foot.
Modifications for People in Pain
Use a strap generously — a longer loop means you do not have to round your shoulders to hold on, keeping the spine neutral. If even a slightly elevated leg is uncomfortable, bend the knee and rest the foot on the strap in a figure-four position, allowing the hip to open laterally rather than stretching the hamstring.
Common Mistakes
Pulling the leg too far toward the face and rounding the lower back defeats the purpose of the stretch. The movement should come from a long hamstring, not a curved lumbar spine. Keep the opposite leg fully extended and the hip bones pressing symmetrically into the mat throughout the hold.
Pose 5: Mountain Pose with Toe Spread (Tadasana Variation)
Mountain pose with active toe spreading is the strengthening pose in this sequence — and the one most often underestimated. While the previous four poses emphasise lengthening tight tissues, this pose builds the intrinsic foot muscle strength that prevents those tissues from becoming tight again. It is one of the most evidence-supported natural foot pain remedies yoga can offer for long-term prevention.
How to Do It
- Stand with your feet hip-width apart, all four corners of each foot (big toe mound, little toe mound, inner heel, outer heel) pressing evenly into the mat.
- Actively spread all ten toes as wide as possible and hold the spread for 3 to 5 seconds.
- Without letting the toes curl, gently lift all ten toes off the mat, hold for 3 seconds, then lower them one by one, starting with the little toe.
- Now press the big toe mound and the little toe mound equally into the mat and lift the inner arch — this is the "tripod foot" or "short foot" position that activates the intrinsic muscles. Hold for 5 breaths.
- Repeat the full sequence 5 to 8 times.
Benefits for Feet
The toe-spreading and lifting sequence directly activates the abductor hallucis, flexor digitorum brevis, and the lumbricals — the small intrinsic muscles of the foot that support the arch from within. Studies consistently show that people with plantar fasciitis have measurably weaker intrinsic foot muscles than pain-free controls, and that strengthening these muscles reduces both pain intensity and recurrence. The "short foot" or arch-lift component specifically targets the mechanism that controls arch height and distributes load away from the plantar fascia.
Modifications for People in Pain
Perform this exercise seated if standing for extended periods aggravates your symptoms. The neural signal to spread and lift the toes is equally effective whether you are weight-bearing or not. Over two to three weeks of seated practice, gradually transition to standing as your tolerance improves.
Common Mistakes
The most common error is allowing the ankle to roll outward when lifting the arch. Watch in a mirror or place your hands on your hips to check that your ankle bones remain centred over your second toe throughout the movement. Also resist the temptation to curl the toes when spreading — the goal is active toe abduction, not toe flexion.

How Often Should You Practice These Poses?
Consistency matters far more than duration. A 10 to 15-minute session performed four to five times per week will produce better results than a single 60-minute session once a week. Connective tissue like the plantar fascia adapts slowly — it responds to gradual, repeated loading and unloading rather than occasional intense stretching.
A practical framework for beginners:
- Weeks 1 to 2: Focus on downward dog and the reclined big toe pose. These are the most accessible and provide immediate relief for acute soreness. Hold each for 5 breaths, two rounds per side.
- Weeks 3 to 4: Add the toe squat (starting with 20 to 30 second holds) and mountain pose toe-spreading after each session.
- Week 5 onward: Incorporate hero pose and progressively lengthen all holds. By this point, most people with moderate plantar fasciitis begin to notice meaningful reductions in morning pain and end-of-day fatigue.
Morning is often the ideal time to practice, particularly for plantar fasciitis sufferers. The plantar fascia shortens overnight and those first painful morning steps occur precisely because the fascia has not yet been warmed and lengthened. Performing the toe squat and downward dog before taking your first steps of the day can substantially reduce that initial peak pain. Keeping a yoga mat beside your bed makes this far more likely to actually happen.
Additional Tips for Getting the Most From Your Practice
Go barefoot strategically at home. Time spent walking barefoot on soft surfaces like carpet, grass, and yoga mats naturally activates the intrinsic foot muscles and reinforces the proprioceptive gains from your practice. Hard floors (tile and hardwood) are less forgiving and should be introduced gradually if you have significant pain.
Pay attention to footwear between sessions. Even the most diligent yoga for foot pain practice can be undermined by daily use of completely unsupportive flat shoes or rigid high heels. Look for footwear with a wide toe box that allows natural toe splay, a heel-to-toe drop of no more than 8mm (lower as your foot strength increases), and adequate cushioning for your body weight and activity level.
Use heat before and cold after. A warm foot soak for five minutes before practicing the toe squat and hero pose significantly increases tissue extensibility, making the stretches more productive and more comfortable. A brief cold application (a bag of frozen peas wrapped in a thin towel) for 10 minutes after a more vigorous session can help manage any temporary inflammatory response, particularly in the early weeks when tissues are adapting to new loads.
Breathe into discomfort, not pain. There is a meaningful difference between the productive discomfort of a deep stretch and the sharp, shooting, or burning sensation of tissue being overloaded. The former should feel intense but manageable and should ease within 30 to 60 seconds of holding. The latter is a signal to back off, modify, or rest. As a general rule: if pain persists for more than 24 hours after a session, you have done too much too soon.
Combine with calf raises for full rehabilitation. Eccentric calf raises — standing on the edge of a step and slowly lowering your heels below step level — have one of the strongest evidence bases of any intervention for plantar fasciitis. When combined with the stretching and intrinsic strengthening in this yoga sequence, they address every major mechanism of the condition. Three sets of 15 repetitions per side, three times per week, is a well-studied protocol.
Key Takeaways
Yoga for foot pain works because it addresses the root causes of foot discomfort rather than simply suppressing symptoms. The five poses in this guide — downward-facing dog, toe squat, hero pose, reclined big toe pose, and mountain pose with toe spread — collectively stretch the tissues that are most commonly tight in people with foot pain, mobilise the joints that tend to become stiff, and strengthen the intrinsic muscles that support the arch from within.
- Start with 10 to 15 minutes per session, four to five times per week, and build gradually.
- Morning practice before your first steps of the day is especially effective for plantar fasciitis.
- Consistency over months produces the most lasting results — connective tissue adaptation is a slow process.
- Combine with sensible footwear choices and, if appropriate, eccentric calf strengthening for the most comprehensive approach.
- Distinguish between productive stretch discomfort and genuine pain — the former is welcome, the latter is a signal to modify.
These yoga poses for plantar fasciitis and general foot pain are safe for the vast majority of people and carry a very low risk of injury when practiced with the modifications described. If your foot pain is severe, persistent beyond three months, accompanied by swelling or bruising, or worsens with the exercises, a consultation with a podiatrist or sports physiotherapist is warranted before continuing.